


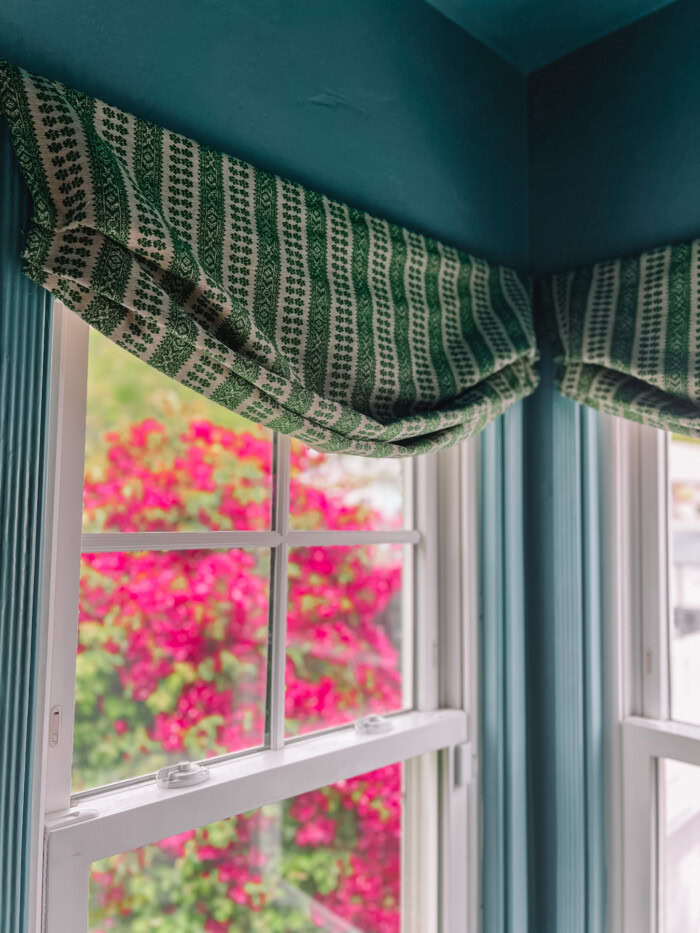
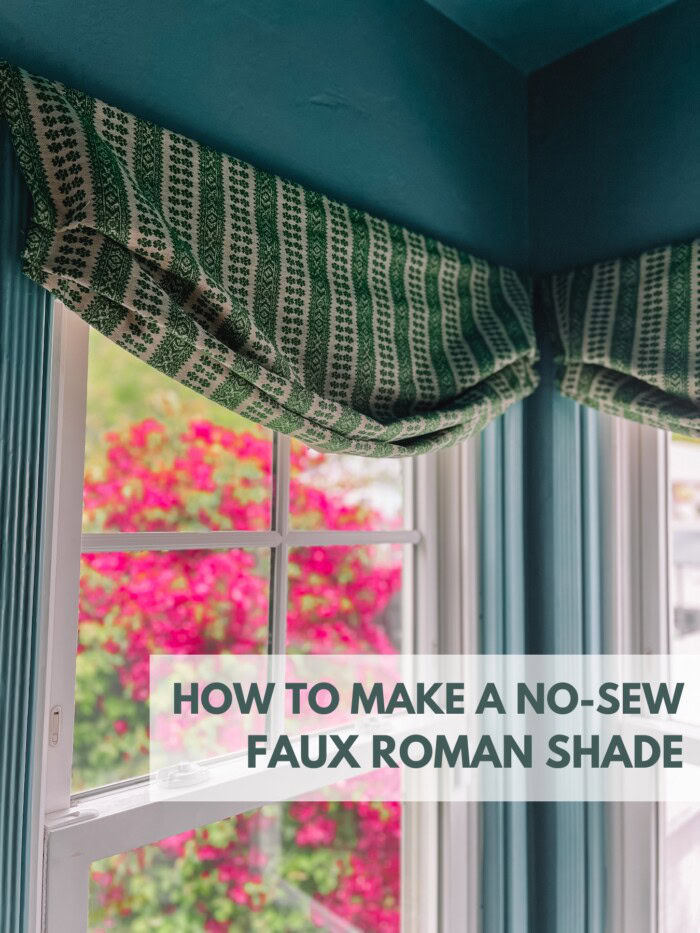
Want to add pattern and texture to your windows on a budget? This faux roman shade tutorial will show you how to give your room the perfect designer touch. This is a no-sew tutorial and can be easily adapted by anyone who loves to sew.
Either way, this is an easy afternoon project that requires only a few things and instantly transforms any window.
What is faux roman shade?
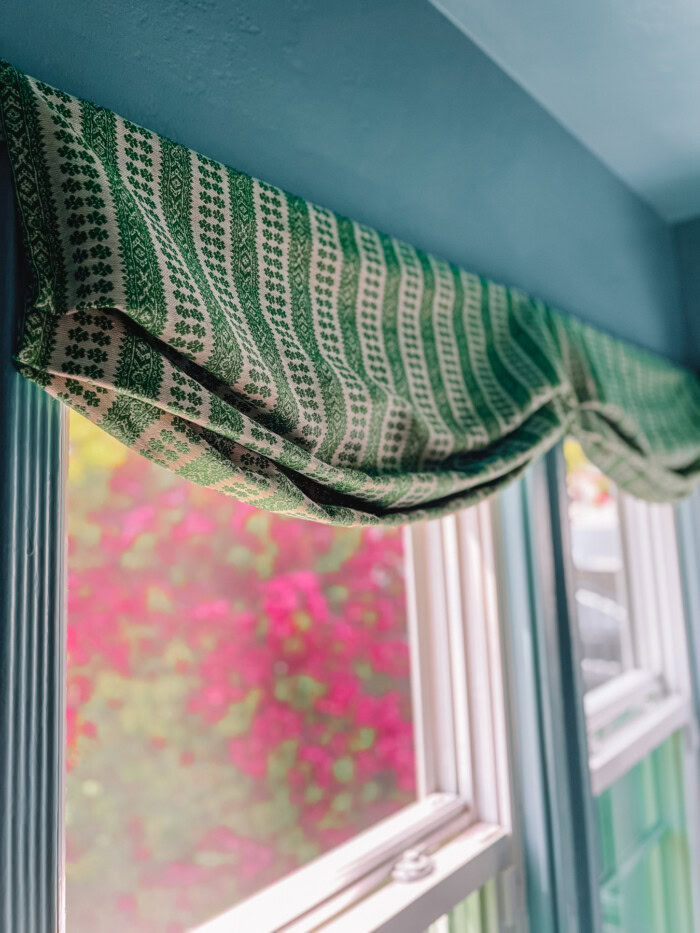
Faux Roman shades act like valances, but look similar to the classic Roman shades that many designers know and love. It is not functional and does not pull down, but instead can make the window feel more finished or hide unnecessary hardware from other blinds on the window.
Faux Roman shades are also a great idea if you don't need privacy or blackout shades on your windows, but want to make them more complete from a design standpoint.
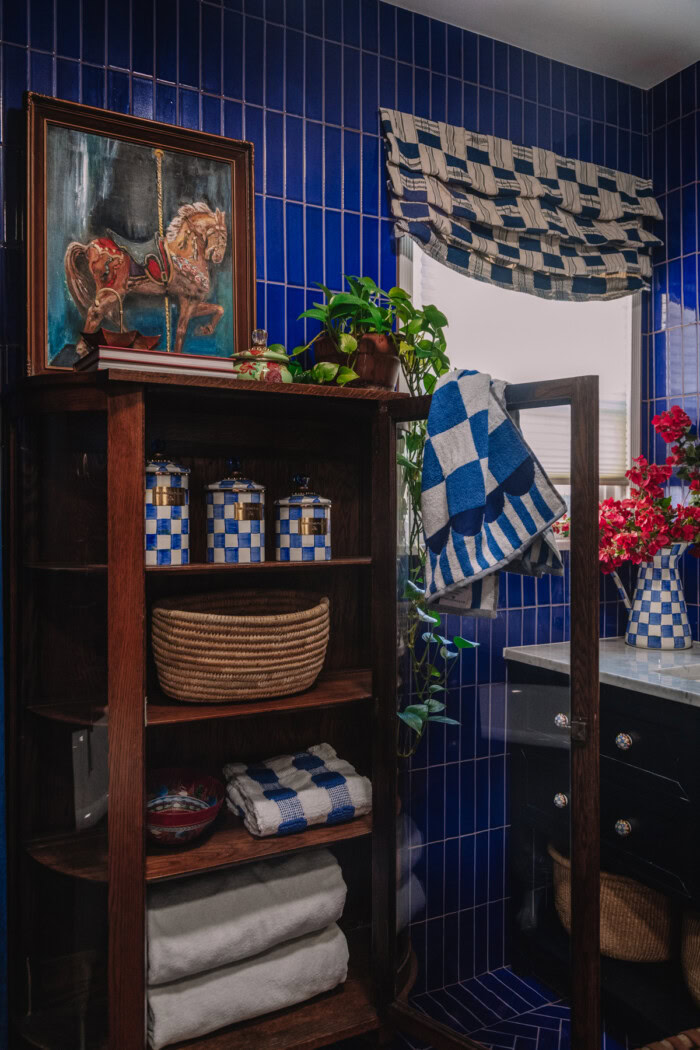
This is perfect if you have a roller shade for cellular blinds with hardware that is functional but not very aesthetically pleasing.
Necessary supplies
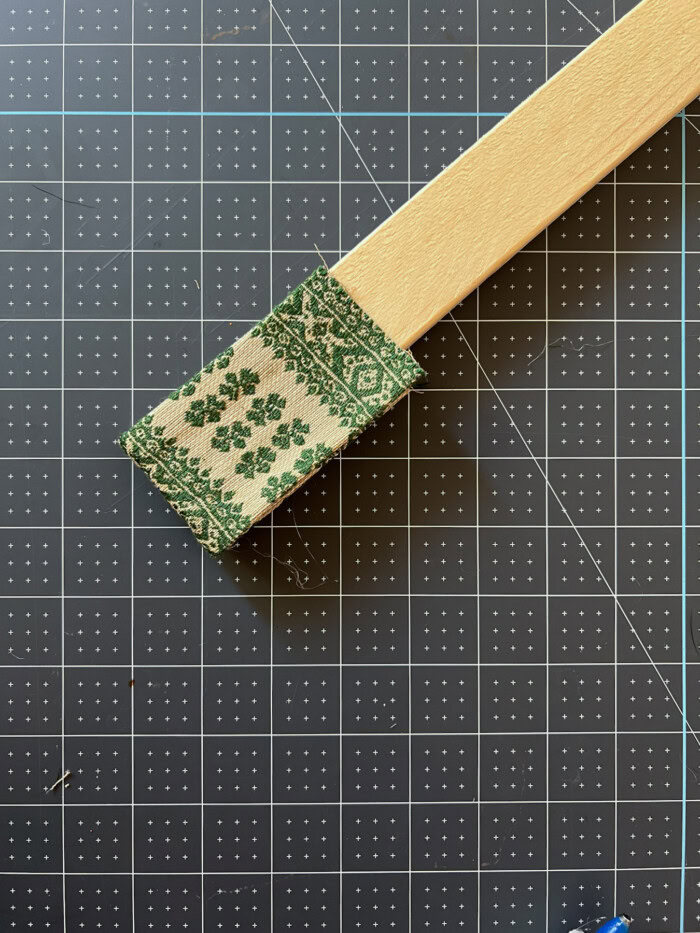
- Cut a 2×1 wood board to the desired width (I added 1.5 inches to the width of the window, so it will overhang slightly. Note: If your window has very thick molding, cut a board deeper than 1 inch. (should be the same as the depth of the molding).
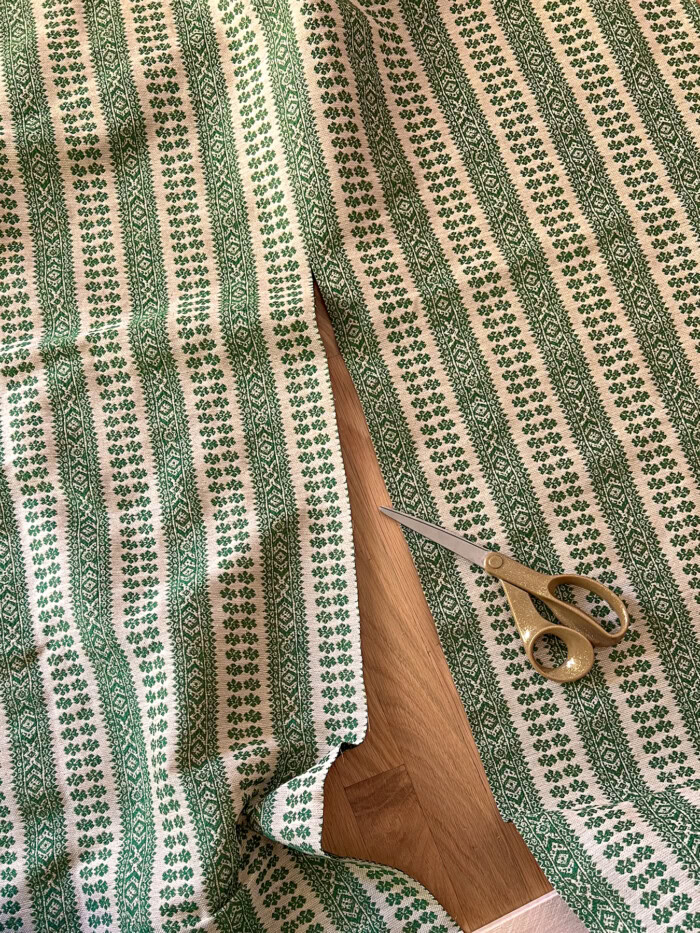
- Fabric – Cut 2 inches wider than the width of the board and 12 inches longer than the final length (to account for the crease) and add two 3” x 8” scraps for finishing.
- Lining fabric – cut to the same size as the main fabric.
- iron
- hot glue gun
- Hem tape if needed (I used thicker fabric for this project, so I used hot glue so the glue lines wouldn't be visible. If you're using thinner fabric, you can use it to finish all edges instead) You may want to use hem tape.)
- fabric scissors
- Needle and thread (optional to secure the fold; you can also use hot glue!)
- hanging screws
Editor's Note: The fabric used in this tutorial is Hedge Green Patmos by Susan Delis. The lining is Joan's oatmeal linen.
step-by-step tutorial
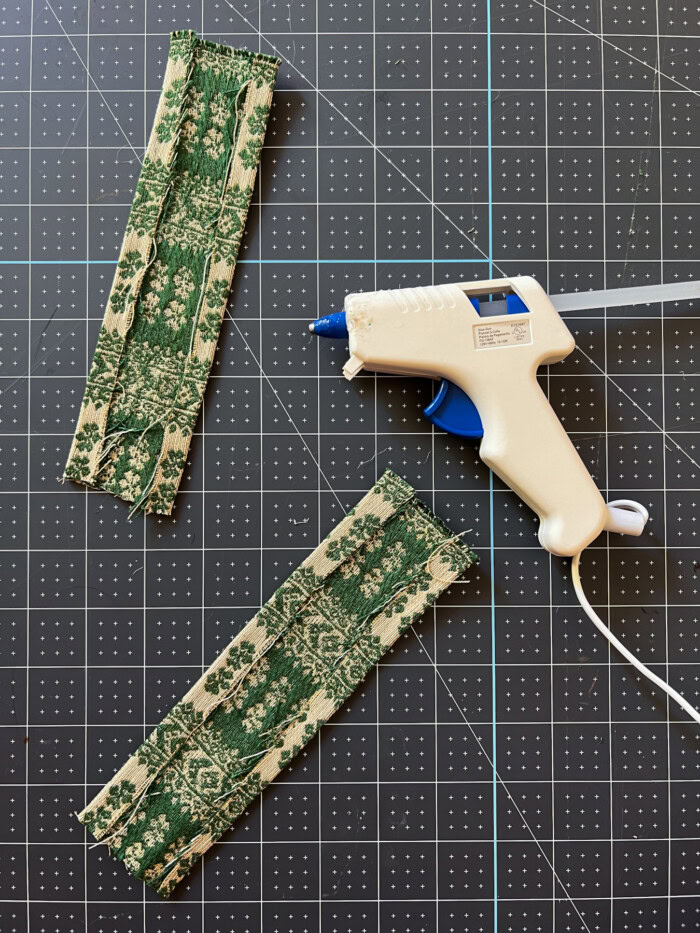
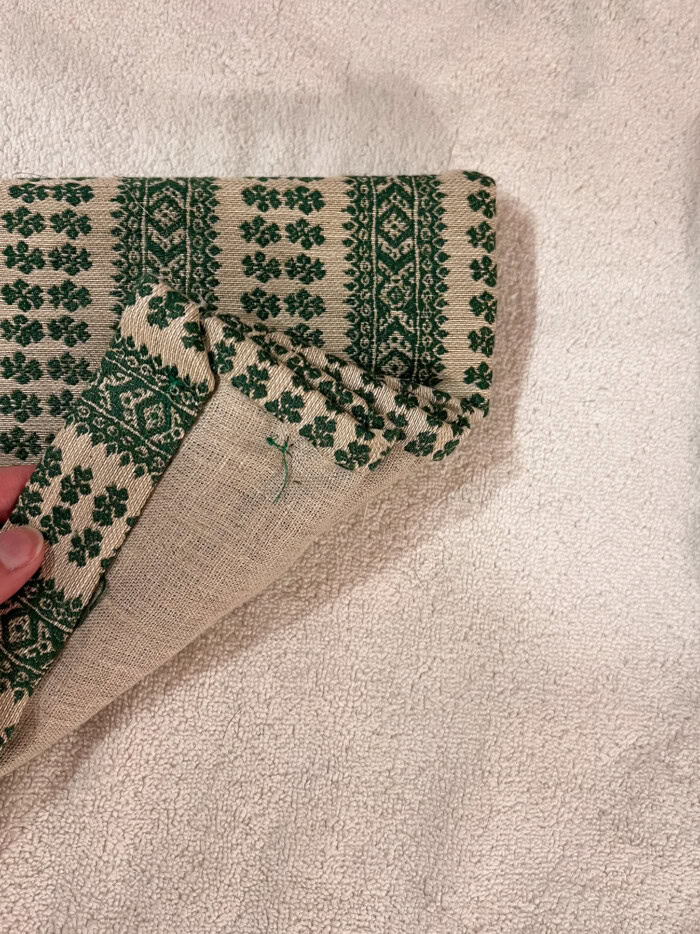
- Cover the edges of the wood boards so they are not exposed to the finished product. Hot glue a 1/2 inch hem to the top and bottom of the small fabric scraps to create a nice hem when finished. Apply hot glue to both ends of the board.
- Iron the fabric. Place the fabric face down on the surface and place the lining fabric on top, face up. The wrong side is the same. Iron the fabric if necessary to make it smooth and wrinkle-free.
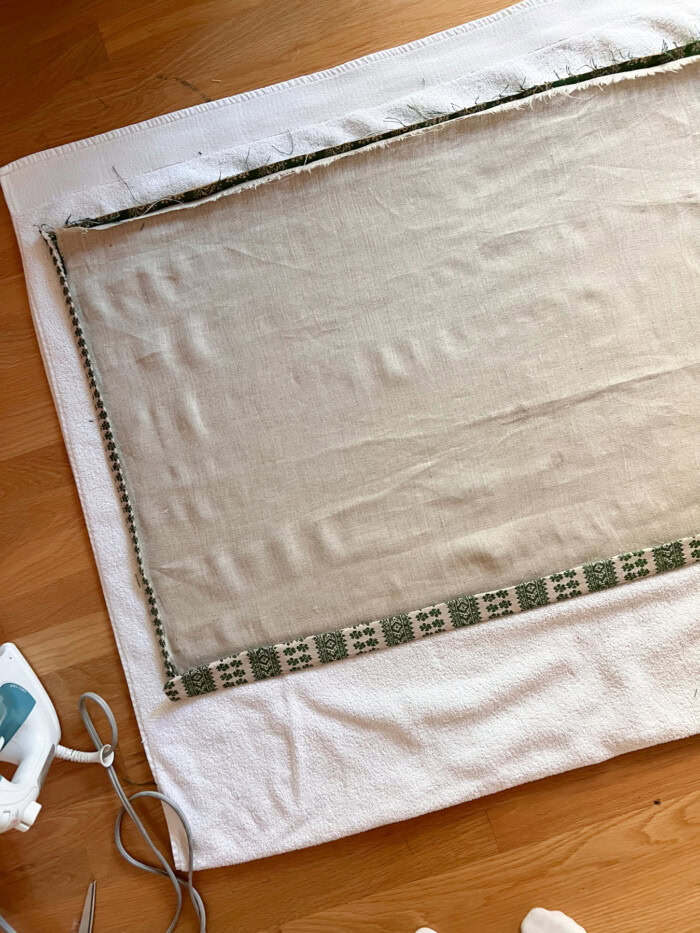
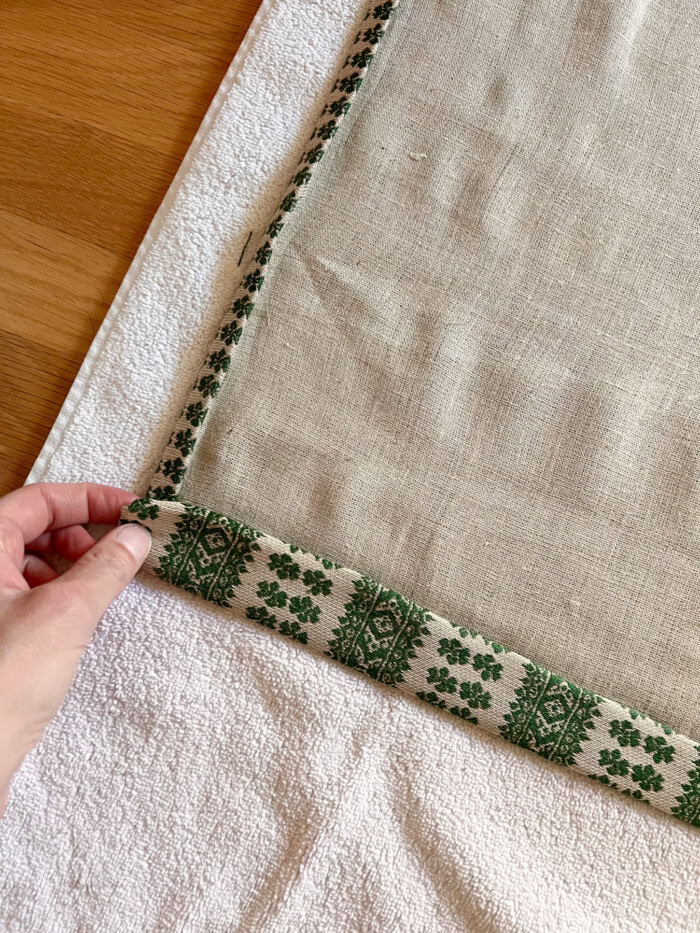
- Hem the sides of the fabric. Fold the edges of both fabrics over 1/2 inch on each side to help iron them together. Apply hot glue in place. Next, fold the hem an additional half inch to create a nice double-fold hem. Iron again. Paste the hot glue in place again. Note: The correct way to hem is to hem the lining fabric over the outside fabric. I instead decided to hem both hems at once using the easy method (as explained above), but I wanted to mention it for the pros who want to do this properly. Ta.
- Hem the hem of the fabric. As with the sides, fold 1/2 inch of the fabric and iron it in place. Since we are going to make it now, there is no need to attach it with hot glue. Making the hem wider here will make it easier for the adhesive to get caught. Next, fold it over again, this time creating a double-fold hem of about 1 inch so the bottom hem is more visible, and iron it. Apply hot glue in place.

- Hem the top of the fabric. This will be glued to the wooden board, so you only need to edge it once. Fold the fabric over 1/2 inch and iron. Apply hot glue in place.
- Attach the fabric to the wood. Hot glue the top edge of the fabric to the top 1 inch of the wood board.
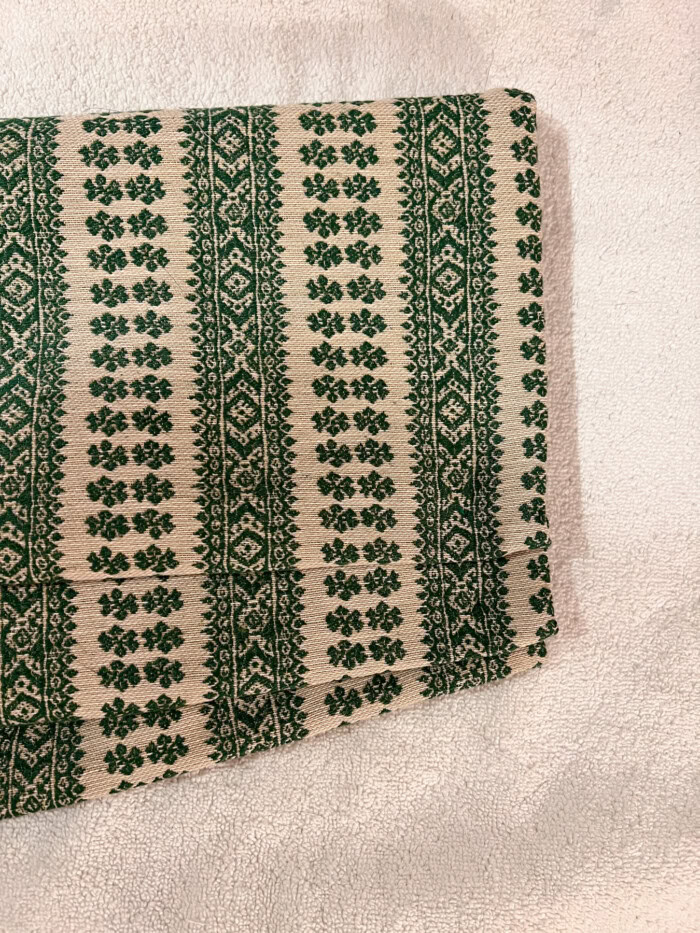
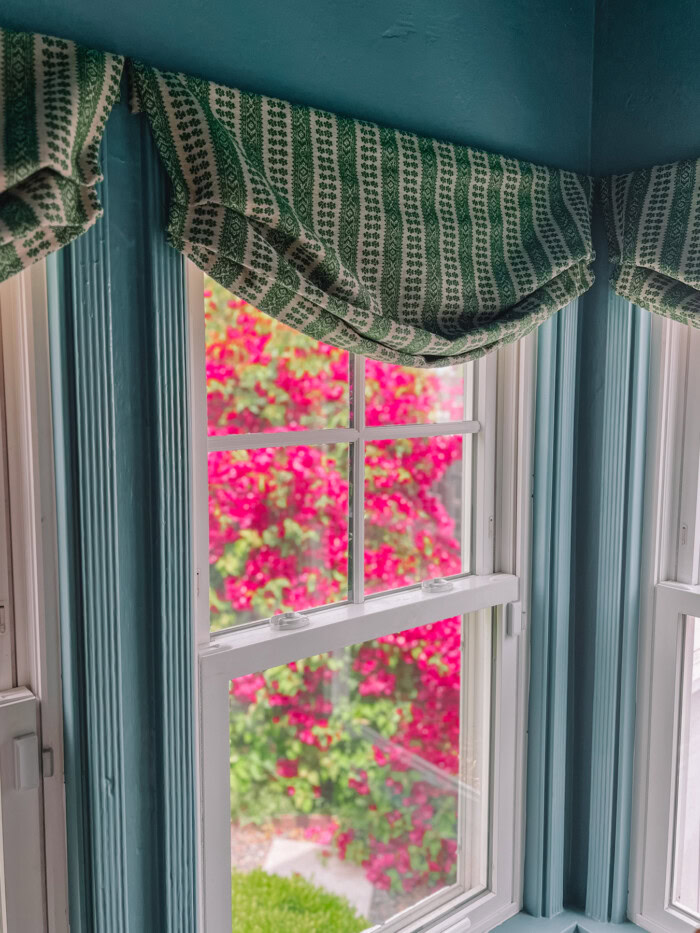
- Create a crease. Make creases in the dough if necessary. The size and amount of folds will depend on the size of the final piece. Stitch a small hand stitch on each side of the fold to secure it in place, or sew with hot glue if you don't want to sew. Next, if you want the traditional Roman shade look with the crease running straight across, you may also need to tuck the crease in the middle, depending on the size of the shade. If you want a relaxed roman shade look, like the style seen in most of the photos here, pull the bottom corner up to below the final crease and pin it in place.
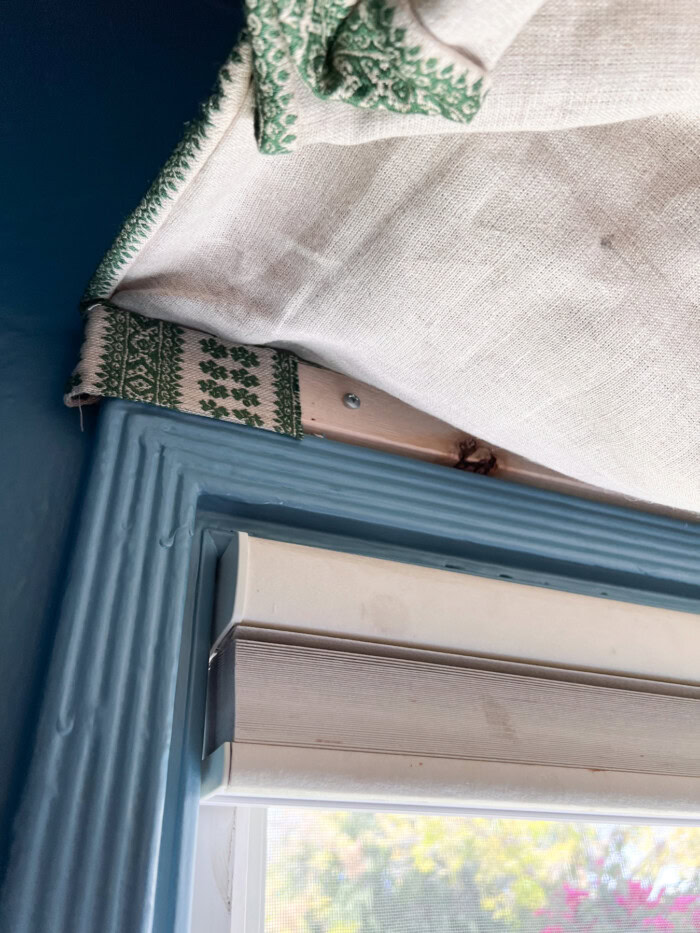
- Hang your shades. How you hang shades depends on the condition of your walls. I used two 2 inch screws to hang it. Place it on the window frame as desired. Turn the fabric over to get it out of the way and pre-drill holes in the wood and wall. Make holes with screws. Turn the cloth inside out and hide it on the tree.
- Adjust as necessary. First, after hanging, adjust the folds as needed and add additional stitches if needed to keep it in place.
Roman shades in different styles
There are many different styles of Roman shades that can be applied to this tutorial.
Plain or flat Roman shades have straight creases that extend from side to side and are the easiest style to create a faux version. These feel very clean and sophisticated.
Relaxed Roman shades have a slight curve at the bottom to create a more relaxed and inviting atmosphere in your space.
To add a contrasting element to any style of Roman shade, you can consider adding a ribbon border. With bright colors drawn from the chosen fabric, this is especially fun in children's rooms.
No matter what style you choose, these simple seamless faux Roman shades will transform the entire look of your room and add a beautiful layer of texture to your space.
More DIY home projects to try
Want to add other budget-friendly decorations to your home and get the most out of it? Try one of these tutorials.